Monday, February 21, 2011

Baked Cinnamon Sugar Doughnuts

IMG_5887-2

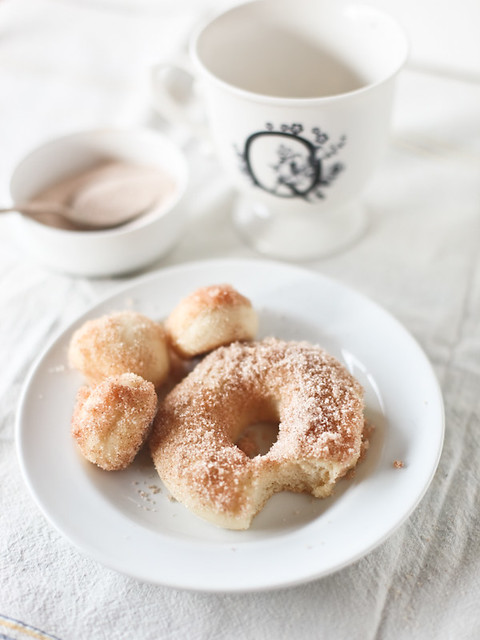
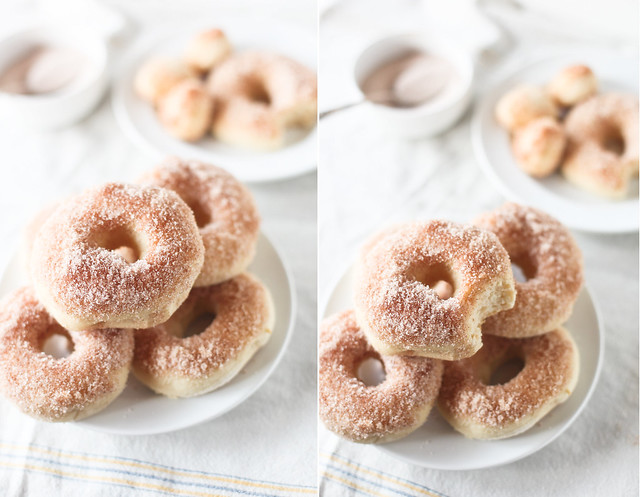
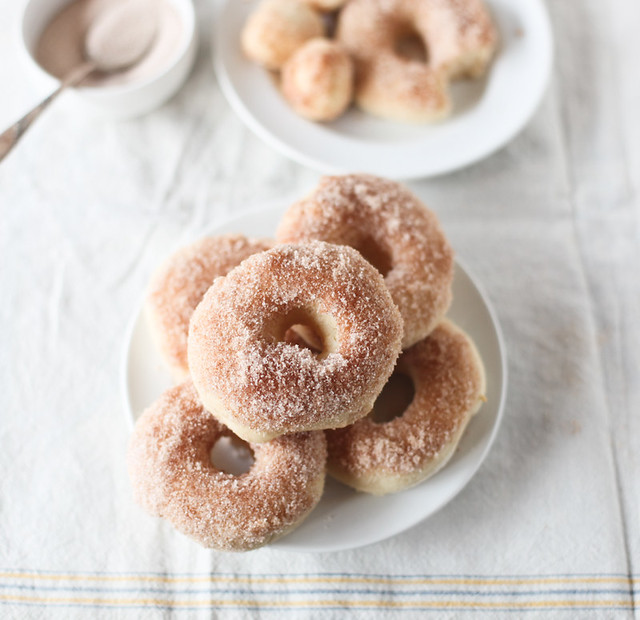
I’ve been craving doughnuts lately. Not the glazed kind, I’m not the biggest fan of those, but rather ones covered in cinnamon sugar. Those are my favorite.

cinnamon sugar doughnuts, baked.

This recipe is from Lara Ferroni’s cookbook, Doughnuts. I absolutely love it. It’s beautiful, filled with Lara’s gorgeous photography, and every single recipe sounds like heaven. It’s well written, easy to understand, I love when recipe writers tell you things like “dough will be soft and moist, but not overly sticky”. That is so helpful when you’re making something new. I can’t say enough good things about it about this cookbook.

This is her baked doughnut recipe. While I wanted doughnuts, I didn’t want to fry anything. It’s messy and I just wasn’t feeling it. I’d never had baked doughnuts before, so I decided to give it a try.

These are beyond delicious. Soft and fluffy, and I bet if you glazed them, you wouldn’t even know they were baked instead of fried. Also, this is the easiest doughnut recipe I have ever used. It came together in no time.


IMG_5925

Baked Doughnuts
From Doughnuts by Lara Ferroni
makes 10-14 doughnuts

a note: I don’t have a doughnut cutter or even a cookie cutter (i know, what is wrong with me?) so I used a mason jar lid and a shot glass to cut out my doughnut shapes. It worked perfectly!

1 egg
1/4 cup superfine sugar
1 cup whole milk, heated to 115F
1 tablespoon active dry yeast
1 teaspoon salt
2 teaspoons vanilla extract
2 1/2 to 3 1/2 cups all purpose flour, divided, plus more for kneading

1/2 cup (1 stick) butter, cut into 1 inch cubes

for topping:
1 stick butter, melted
1 cup superfine sugar + 2 tablespoons cinnamon (more or less, depending on your taste), mixed together

In the bowl of a stand mixer fitted with the paddle attachment, beat the egg and sugar on medium speed until blended, about 1 minute. Add the milk, yeast, salt and vanilla, and stir to blend. With the machine on low speed, add 2 cups of flour, about 1/2 cup at a time, and beat until the dough is thick and pulls away from the sides of the bowl.

Switch to the dough hook. With the machine on medium speed, add the butter one piece at a time, and beat until no large chunks of butter are left in the bottom of the bowl, 3-5 minutes. Reduce speed to low and add the additional flour until the dough gathers around the hook and cleans the sides of the bowl. It will be soft and moist, but not overly sticky.

Turn the dough out onto a floured surface and knead gently until the dough no longer sticks to your hands. Lightly grease a large mixing bowl.

Transfer the dough to the bowl and turn to coat. Cover with a damp tea towel and let rise in a warm spot until doubled in volume, about 1 hour.

Punch down the dough and roll out to 1/2 inch thick. With a doughnut or a cookie cutter, cut out 3 inch diameter rounds with 1 inch diameter holes.

Preheat the oven to 400 and line a baking sheet with parchment paper. Place the doughnuts at least 1 inch apart on the baking sheet. Cover with plastic wrap and let sit in a warm spot until nearly doubled in size, about 20 minutes.

Bake until the doughnuts are light golden brown, 5 to 8 minutes, being very careful not to overbake them.

Immediately out of the oven, dip into butter, then directly into cinnamon sugar mixture.

Best eaten fresh and warm.

Monday, February 14, 2011

Peasant Bread

IMG_4794 copy-2

I don’t really have anything against Valentines Day. I like red & pinks hearts, I like chocolate, I like flowers (but not roses. I think they’re ugly). But none of those things mean love to me.

IMG_4809 copy-2

You know what does though? Spending time with the people I love. And homemade bread. Homemade bread just tastes like love, doesn't it?


IMG_4828 copy-3

So that’s what I’m doing today. Baking really good bread, and sharing it. With my family, and you too!

Happy Valentines Day!

European Peasant Bread
from Artisan Bread in Five Minutes a Day
Makes four 1 pound loaves

Ingredients

3 Cups lukewarm water
1 1⁄2 Tablespoons granulated yeast
1 1⁄2 Tablespoons Kosher salt
1⁄2 Cup rye flour
1⁄2 Cup whole wheat flour
5 1⁄2 Cups unbleached all purpose flour
Cornmeal for dusting the peel


Mixing and storing the dough: Mix yeast and salt with water in a 5 qt. bowl or lidded (not airtight) food container.


Mix in the remaining dry ingredients without kneading. You may have to use your hands to get the last bit of flour mixed in.


Cover (not airtight) and allow to rest at room temperature until the dough rises and collapses (or flattens on top), about 2 hours.


The dough can be used immediately after the initial rise, although it is easier to handle when cold. Refrigerate in the lidded (not airtight) container and use over the next 14 days.


On baking day, dust the surface of the refrigerated dough with flour, and cut off a 1-pound piece (grapefruit-size). Dust with more flour and quickly shape it into a ball by stretching the surface of the dough around to the bottom on all four sides, rotating the ball a quarter turn as you go. Allow to rest and rise on a cornmeal-covered pizza peel for 40 minutes.

Twenty minutes before baking time, preheat the oven to 450°F, with a baking stone placed on the middle rack. Place an empty broiler tray on any other shelf that won't interfere with the rising bread.

Sprinkle the loaf liberally with flour and slash a cross, "scallop," or tic-tac-toe pattern on the top, using a serrated bread knife. Leave the flour in place for baking; tap some of it off before slicing.

Slide the loaf directly onto the hot stone. Pour 1 cup of hot tap water into the broiler tray and quickly close the oven door. Bake for about 35 minutes or until the top crust is deeply browned and very firm. Smaller or larger loaves will require adjustments in baking time.

Thursday, February 03, 2011

The Kitchen Generation

Untitled-1

Say hello to The Kitchen Generation.

You have no idea how ridiculously excited I am to share this with you all.

In April of 2010, I met Elissa, Kamran, Lauren and Tessa through twitter. We starting chatting about an idea we had - and idea for a website all about our love of being in the kitchen. We knew we had a unique perspective seeing as how we are all young, in our teens and early twenties. And we wanted to share that with the world.

It’s taken nearly a year, but it’s finally here. Soon at The Kitchen Generation, you’ll find all sorts of food related things. Tips, tutorials, stories, and other fun stuff. I hope you’ll pay us a visit.

Check out the site: The Kitchen Generation

Follow us on Twitter: @ktchngeneration
Like us on Facebook