today, my dad and i made table lighting. we followed these instructions, with a few modifications. it's not competely right yet, the light is a little too yellow, as you'll see in the pictures. i'm going to get some different light bulbs, and something more transparent than the tracing paper i used.
what we used:
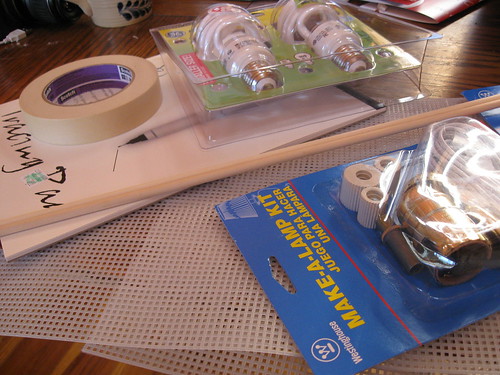
100watt energy save bulbs, tape, tracing paper, cross stitch board, dowel rods, and a lamp kit. and particle board. first, dad cut grooves into the particle board.
then we did as the instructions said and cut a hole in the board and inserted the light socket.
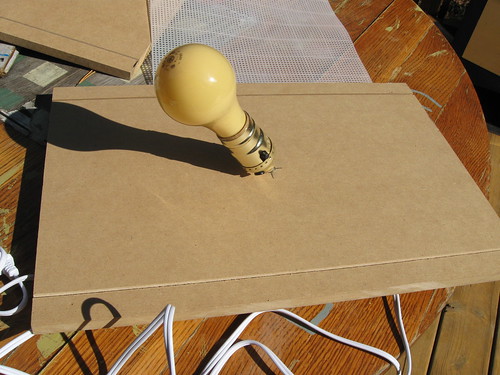
but neither a regular bulb or a energy save bulb fit.
so dad modified.
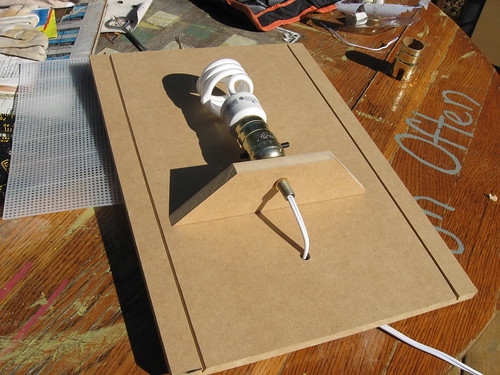
he made a little ledge to put the light socket on and then cut a hole so we could put the wire through the back.
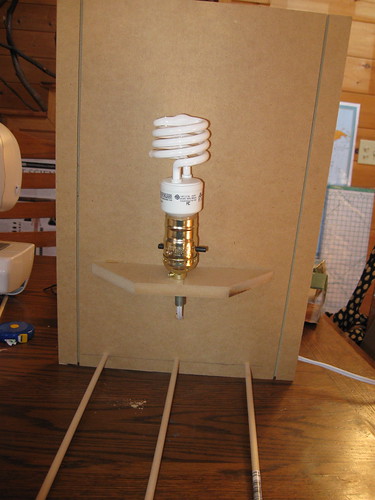
he then cut holes in the bottom for the dowel rods and and we slid them through. these are great, because you can lower the light if you need to.
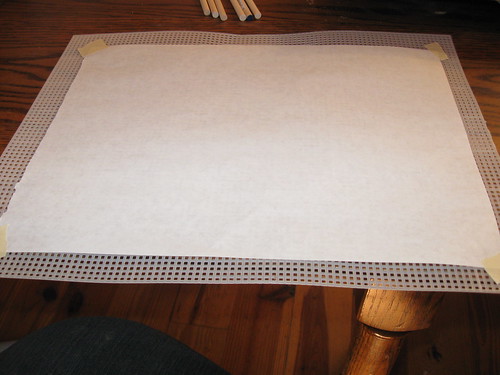
i then taped the tracing paper on the cross stitch board. the tape didn't hold it well enough, so i ended up stapling it to it.
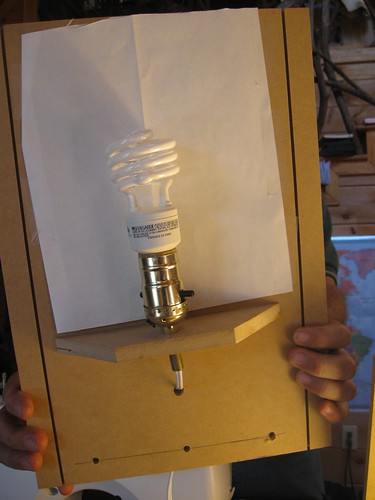
we taped white paper to the board behind the light so it wouldn't reflect the brown wood.
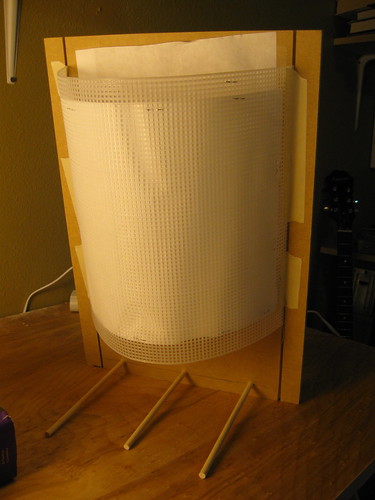
here's what the finished product looks like. i slid the cross stitch board in the grooves and then taped it.
like i said, it's not perfect yet, i'm still going to make some modifications. but overall we spent about 15 bucks. which is much better than the 250+ you'd spend if you bought it already made.
i'm going to post some photos i took using it in a seperate post.
thanks for all the help dad, you're the greatest!
what we used:

100watt energy save bulbs, tape, tracing paper, cross stitch board, dowel rods, and a lamp kit.
 and particle board. first, dad cut grooves into the particle board.
then we did as the instructions said and cut a hole in the board and inserted the light socket.

but neither a regular bulb or a energy save bulb fit.
so dad modified.

he made a little ledge to put the light socket on and then cut a hole so we could put the wire through the back.

he then cut holes in the bottom for the dowel rods and and we slid them through. these are great, because you can lower the light if you need to.

i then taped the tracing paper on the cross stitch board. the tape didn't hold it well enough, so i ended up stapling it to it.

we taped white paper to the board behind the light so it wouldn't reflect the brown wood.

here's what the finished product looks like. i slid the cross stitch board in the grooves and then taped it.
like i said, it's not perfect yet, i'm still going to make some modifications. but overall we spent about 15 bucks. which is much better than the 250+ you'd spend if you bought it already made.
i'm going to post some photos i took using it in a seperate post.
thanks for all the help dad, you're the greatest!

SUPER COOL! I'm totally jealous. THIS IS GREAT! No matter when I bake, I have to wait til the morning to take my pictures for me blog, and then hope that the weather is nice and sunny.... and they still don't always come out good!
ReplyDeletethanks!! it in no way beats natural night, but it's pretty nice.
ReplyDeleteشركة مكافحة حشرات بالدمام
ReplyDeleteشركة رش مبيدات بالدمام
شركة مكافحة النمل الابيض بالدمام
شركة رش مبيدات بالخبر
شركة مكافحة النمل الابيض بالخبر
شركة مكافحة حشرات بالخبر
شركة مكافحة النمل الابيض بالجبيل
شركة مكافحة حشرات بالجبيل
شركة رش مبيدات بالجبيل
شركة مكافحة حشرات بالقطيف
شركة مكافحة النمل الابيض بالقطيف
شركة رش مبيدات بالقطيف