Thursday, July 30, 2009

Oatmeal Cookies

oatmeal cookies

It’s been an exciting week for me. First, I was offered a job doing something I already love to do. Second, Elise from Simply Recipes twittered about me. ME! The little ol’ food blogger who occasionally uses t-shirts as table cloths for photos. (please pretend you never heard that. thank you.) Crazy! Insane! Simply Recipes is one of the first food blogs I ever found, and I’ve been a loyal reader ever since.

oatmeal

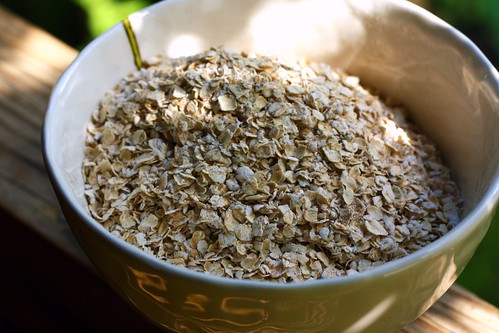
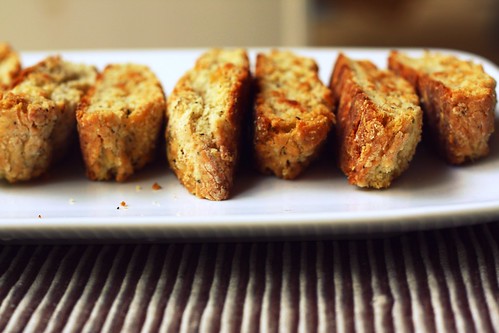
How did I celebrate? By baking oatmeal cookies. Oats are one of my favorite ingredients. I love them in just about everything. But before today, I had never made oatmeal cookies. I found this recipe a couple of weeks ago and it intrigued me. Whole wheat flour, honey, dark brown sugar and craisins? Sounded amazing.


craisins.

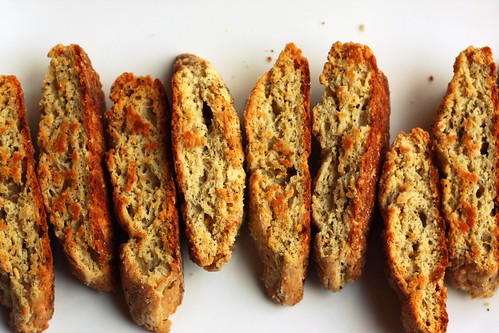
And they are. That hint of honey really brings it all together. I think I’ll add a little more next time. Honey + Oats is a match made in heaven. These are super easy to make so you have no excuse. Make them today!

oatmeal cookies

Oatmeal Cookies

1 cup all-purpose flour
1 cup whole wheat flour
1 tsp baking powder
1 tsp ground cinnamon
1/2 tsp baking soda
1/2 tsp salt
freshly ground nutmeg
2 sticks butter, room temperature
1/2 cup sugar
1/2 cup (packed) dark brown sugar
1/4 cup honey
2 large eggs
1 tablespoon vanilla extract
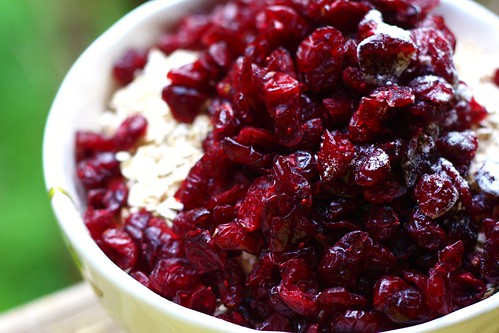
3 cups old-fashioned oats
1 cup craisins

Preheat oven to 350 degrees F. Combine the two flours, baking powder, cinnamon, baking soda, salt, and nutmeg medium bowl. Using an electric mixer, beat butter, sugar, and brown sugar until fluffy. Then add in the honey, eggs, and vanilla.

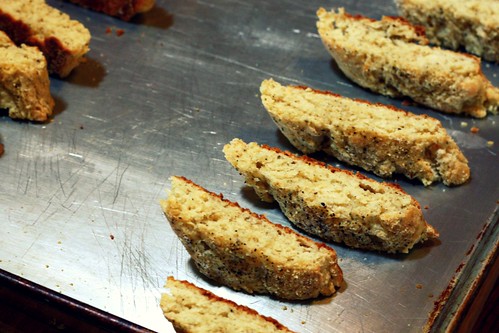
Remove from the mixer and stir in the flour mixture. Next stir in oats and craisins. Drop spoonfuls of the batter onto silpat- or parchment-lined cookie sheets. Flatten cookies slightly.

Bake cookies until golden brown, about 10 minutes (mine took 15). Cool completely.

Monday, July 27, 2009

farmers market lavender.

Life has been oh so busy for me lately. I'm still loving my job at the farmers market, the sense of community is just great, I don't even mind getting up at 5 am to be there! I'm learning so much about gardening and farming. Those farmers are a wealth of knowledge!

farmers market peppers

Baking has slowed down so much lately. I can't believe I used to do for-fun baking 3 or 4 days a week! I've got to schedule it on my calendar to get it done now! I've got a couple of oat recipes coming this week - cookies and granola. I've tried the granola and it is so, so delicious. I can't wait to post about it!

bench monday.

I'm excited to see where all of this is taking me, where God is taking me. Sure, I'm not making a whole lot of money at the farmers market but I think the experience is so worth it.

Is anything exciting happening in your life?

Thursday, July 23, 2009

Tuesday, July 21, 2009

Hummingbird Cupcakes with Orange Marmalade Frosting.

hummingbird cupcakes

Several years ago my mom was catering a ladies tea at my church. She wanted me to do the dessert, and I instantly knew what I what I was going to make: hummingbird cake. A room full of church goin’ southern women? How could I pick anything else?

It’s said that hummingbird cake first appeared in Southern Living magazine in 1978, submitted by a Mrs. L.H. Wiggins of Greensboro, NC, since then it’s swept the south, charming us with it’s fruity sweetness.

hummingbird cupcakes

When I was looking up recipes for the tea, I found this one for hummingbird cupcakes with orange marmalade frosting. It was so, so perfect, but I hadn’t made it since then. The other day, I was reminded of the event, and I got a hankering.

This cake can seem labor intensive, but it’s not, really. Buy pre-crushed pineapple and all you have to do is shred your carrots and zest your oranges. The end result is worth it.

hummingbird cupcakes

The flour content is quite low in these, it’s mostly held together by fruit and veggies. They fall apart as soon as you bite into them. You might even have to eat them with a fork. But you will not be disappointed! I topped half of these with the yummy frosting and half with plain orange marmalade. Either way is delicious!

hummingbird cupcakes

Hummingbird Cupcakes With Marmalade Frosting
makes about 12.

Cupcakes

1 1/4 cups all-purpose flour
1 teaspoon baking powder
1/2 teaspoon cinnamon
3/4 cup superfine sugar
1/2 cup safflower oil
2 eggs
1/2 cup mashed banana
1 1/2 tablespoons grated orange zest
1/2 cup shredded carrot
1/2 cup crushed pineapple, drained
1/2 cup flaked coconut

Frosting

1/2 cup sweet butter, softened
2 1/2 cups powdered sugar, sifted
2 tablespoons freshly squeezed orange juice (i used about 3)
2 tablespoons orange marmalade (i used about 4)

Preheat oven to 350°; place 12 paper baking cups in a muffin tin. In a bowl, sift flour, baking powder, and cinnamon. In the bowl of an electric mixer, cream the sugar and oil with an electric mixer until light and fluffy. Beat in the eggs slowly; then stir in the dry ingredients in 3 batches. Add in the the banana, orange zest, carrot and pineapple; stir until combined. Spoon the batter into the cups; bake for 20-25 minutes or until test done. Remove pan from oven and cool for 5 minutes; remove cupcakes and cool on wire rack.
Make the frosting: beat the butter in a bowl; add in the remaining ingredients; stir to combine.

Thursday, July 16, 2009

The secret ingredient is...

root beer

Root beer!

I really love root beer. I love how the bubbles always go up my nose when I drink it. I love how it seems to taste like summer - all care free and child like. I remember drinking it as a kid, always IBC. I didn’t even know any one else made root beer for the longest time.

root beer cake

But I’d never thought of putting it in a cake before. It’s kind of crazy when your batter fizzes as you stir it. While you don’t really taste the root beer in the cake, you do in the frosting. It’s probably one of the most delicious frostings I’ve ever made. All chocolatey and root beery. And the cake is so, so moist, it’s a super good chocolate cake with a twist - you can’t really identify it.

I think I’m going to have to make a cream soda cake next.


root beer cake

root beer cake

Root Beer Float Cake

From Baked, New Frontiers in Baking

2 cups root beer (don’t use diet)

1 cup dark unsweetened cocoa powder

1/2 cup unsalted butter, cut into 1/2 inch cubes

1 1/4 cup granulated sugar

1/2 cup dark brown sugar

2 cups all-purpose flour

1 1/4 teaspoons baking soda

1 teaspoon salt

2 large eggs

Preheat even to 325 degrees F. Spray the inside of a 10-inch Bundt pan (or 2 round cake pans) with nonstick cooking spray, or butter generously and dust with flour, knocking out the excess.

In a small saucepan, heat the root beer, cocoa powder and butter over medium heat until butter is melted. Add sugars and whisk until dissolved. Remove from heat and let cool.

In a large bowl, whisk together the flour, baking soda and salt.

In a small bowl whisk the eggs until just beaten. Then whisk into the cocoa mixture until combined. Gently fold the flour mixture into the cocoa mixture. The batter will be slightly lumpy. You can give it a quick whisk if you like, but don’t over beat the batter or it could cause the cake to be tough. Don’t worry, the batter is very loose.

Pour the batter into prepared pan and cook for 35-45 minutes (or 25-30 minutes for 2 cake pans), rotating the pan halfway through baking until a sharp knife inserted in the center comes out clean. Transfer to a wire rack to cool completely then loosen edges with a butter knife and turn out onto a cake plate.

Chocolate Root Beer Frosting

2 ounces 60% cocoa, melted

1 stick unsalted butter, softened

1 teaspoon salt (you may want to use less… maybe just 1/2 teaspoon)

1/4 cup root beer

2/3 cup unsweetened cocoa powder

2 1/2 cups powdered sugar

In the bowl of a stand mixer, or using an electric hand mixer, beat softened butter and cocoa powder. Once combined add the melted chocolate, salt, powdered sugar and root beer. Beat together until smooth. Spread on top of cooled cake. Slice and serve with vanilla ice cream.

Wednesday, July 08, 2009

Biscotti part 2: the sweet

biscotti part 2

After last weeks super successful savory biscotti, I had to try a sweet recipe. To me, this is coffee shop biscotti. Perfect for a late afternoon staring out a window with a big cup of coffee or tea.

biscotti part 2

I avoided making biscotti for so long, I have no idea why. I remember looking at some more complex recipes, ones where you had to bake it at a low temperature and then let it sit out over night. Both the recipes I’ve tried are nothing like that, and they come out perfectly. Crunchy and delicious. The almonds in the one really make it, in my opinion. It gives a nice contrast to the chocolate-chocolate.

biscotti part 2

Just a tip: I’ve noticed with a lot of recipes that use cocoa powder, if you let them sit for a little while, and don’t eat them straight of the oven, they taste much better. The flavors seem to develop and they get a little sweeter. I tried these several hours out of the oven and they were so much better that the first time.

biscotti part 2

Double Chocolate Almond Biscotti
from Gourmet

2 cups all-purpose flour
1/2 cup unsweetened cocoa powder
1 teaspoon baking soda
1 teaspoon salt
3/4 stick (6 tablespoons) unsalted butter, softened
1 cup granulated sugar
2 large eggs
1 cup slivered almonds
3/4 cup bittersweet chocolate chips

Preheat oven to 350° F and butter and flour a large baking sheet.

In a bowl whisk together flour, cocoa powder, baking soda, and salt. In another bowl with an electric mixer beat together butter and granulated sugar until light and fluffy. Add eggs and beat until combined well. Stir in flour mixture to form a stiff dough. Stir in the almonds and chocolate chips.

On prepared baking sheet with floured hands form dough into two slightly flattened logs, each 12 inches long and 2 inches wide. Bake logs 35 minutes, or until slightly firm to the touch. Cool biscotti on baking sheet 5 minutes.

On a cutting board cut biscotti diagonally into 3/4-inch slices. Arrange biscotti, cut sides down, on baking sheet and bake until crisp, about 10 minutes. Cool biscotti on a rack. Biscotti keep in airtight containers 1 week and frozen, 1 month.

Sunday, July 05, 2009

16

29

28

11

Yesterday I did a day in my life. You can see it here.

Thursday, July 02, 2009

Biscotti part one: the savory

biscotti

Although I much prefer baking to cooking, I’d take a cheeseburger over a piece of cake any day. It’s true. I much prefer savory foods to sweet ones. Don’t get me wrong - I love a good piece of pie, but I can never eat more than just a piece. I don’t like that much sugar.

biscotti

But I love baking. I love measuring things out, following a recipe, all the method that goes into it. Which is weird, because I’m not a very methodical person.

So I always love when I find a recipe for savory baking. They are hard to find, outside of bread making. When I can across this recipe for Parmesan Black Pepper Biscotti, I had to make it. I knew I’d love it.

biscotti

This smells absolutely amazing while it’s baking. My mouth was watering. It’s almost like smelling pizza baking. When it came out of the oven the first time, I could help by the taste it. Delicious, it would be perfect to go along with a salad. Then it went in for a second time and came out even better. The crunchiness really works for the flavors.

You should make these tonight, they’d be perfect with dinner!

biscotti

Parmesan Black Pepper Biscotti
From Epicurious

1 1/2 tablespoons whole black peppercorns
4 cups all-purpose flour plus additional for dusting
2 teaspoons baking powder
2 teaspoons salt
4 1/2 ounces Parmigiano-Reggiano, finely grated (2 1/4 cups)
1 1/2 sticks (3/4 cup) cold unsalted butter, cut into 1/2-inch cubes
4 large eggs
1 cup whole milk


Put oven racks in upper and lower thirds of oven and preheat oven to 350°F.

Pulse peppercorns in grinder until coarsely ground. (or just buy a peppercorn grinder at the grocery store.)

Whisk together flour, baking powder, salt, 2 cups cheese, and 1 tablespoon ground black pepper in a large bowl. Blend in butter with a pastry blender or your fingertips until mixture resembles coarse meal. Whisk 3 eggs with milk and add to flour mixture, stirring with a fork until a soft dough forms.

Turn dough out onto a lightly floured surface and quarter dough. Using well-floured hands, form each piece into a slightly flattened 12-inch-long log (about 2 inches wide and 3/4 inch high). Transfer logs to 2 ungreased large baking sheets, arranging logs about 3 inches apart.

Whisk remaining egg and brush some over logs, then sprinkle tops of logs evenly with remaining 1/4 cup cheese and 1/2 tablespoon ground pepper. Bake, rotating sheets 180 degrees and switching position of sheets halfway through baking, until logs are pale golden and firm, about 30 minutes total. Cool logs to warm on sheets on a rack, about 10 minutes.

Reduce oven temperature to 300°F.

Carefully transfer 1 warm log to a cutting board and cut diagonally into 1/2-inch-thick slices with a serrated knife. Arrange slices, cut sides down, in 1 layer on a baking sheet. Repeat with remaining logs, transferring slices to sheets. Bake, turning over once, until golden and crisp, 35 to 45 minutes total. Cool biscotti on baking sheets on racks, about 15 minutes.