Sunday, January 31, 2010

No Knead Bread

seriously good.

Let me start by saying a couple of things: 1. Crusty, chewy bread is one of my very favorite things in the world. 2. this bread is quite possibly the best thing I’ve ever baked. 3. it’s also one of the easy things I’ve ever made.

I’m a bread lover, it’s true. I love a good, crusty french loaf probably more than the next person. I believe that it’s one of our greatest triumphs as humans, creating crusty bread. But I’d never, ever tried to make it at home.

It was just so daunting. I’ve looked at a thousand recipes for it, most of them calling for no fewer than 3 rises, lots of kneading, some voodoo and a bread dance. It just seemed so complicated! But when I stumbled upon this recipe last night, I knew I had to make it.
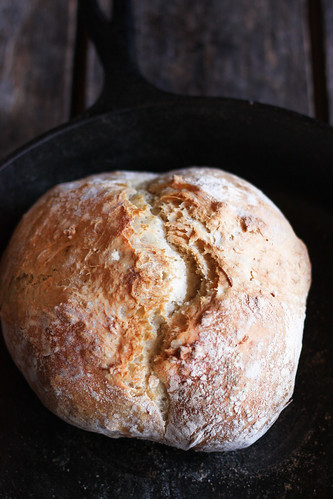
gorgeous crust.

It’s from the book Artisan Bread in Five Minutes a day, which I don’t own, but I’m now seriously considering purchasing it. This is so easy, and requires only 4 ingredients.

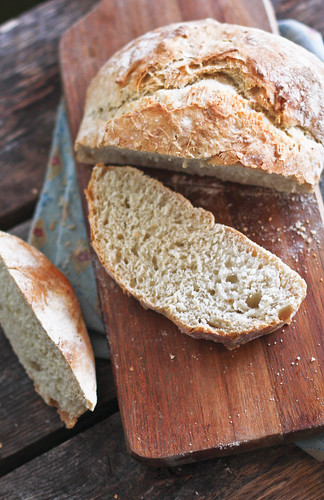
My brother exclaimed “This tastes just like Panera’s bread!” which is a high compliment coming from him, as he can eat a whole long loaf by himself. Get yourself in the kitchen and make this right now. It’s that good. It'd be perfect for sandwiches, bread bowls for soup, or even pizza crust.

Recipe notes: It might seem difficult to incorporate all of the flour into the yeast mixture, but just keep mixing. You can add just a little bit of water at a time to help, if needed. The recipe calls for a pizza stone, but I don’t have one, so I just used a cast iron skillet instead. Also, my second rise took a bit longer than the 40 minutes suggested, probably about an hour and 15 minutes to get to the size I wanted.
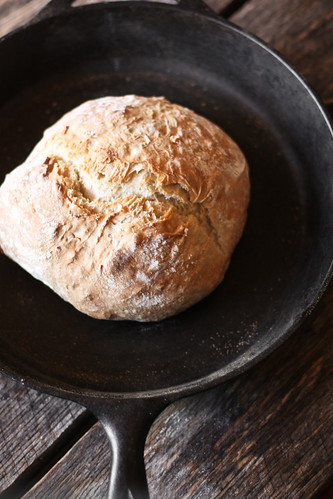


No Knead French Bread
From Artisian Bread in 5 Minutes a Day via The Ivory Hut


3 cups of lukewarm water

1 1/2 tablespoons active dry yeast

1 1/2 tablespoons coarse salt

6 1/2 cups all-purpose flour


Grab a very large mixing bowl, or a large container that you can cover. In it, mix the water, yeast, and salt. You don’t have to heat up the water to a precise optimal temperature for the yeast. I’ve even used just regular tap water, and it’s worked well for me. Just let that sit together for a while (you don’t have to wait for the yeast to dissolve completely), then dump the flour all at once and stir with a wooden spoon. You don’t need to knead this, and you’re not looking to make it come together into a dough ball. You just want everything mixed well, with no streaks of flour left, and you’re done.


Leave it in your container, covered (but not airtight, or it’ll pop), for a few hours. When it has risen and then deflated a bit, your dough is done. It’s ready to be used or stored in the refrigerator.

To bake the bread, just grab a chunk of dough, about the size of a grapefruit. Dust your hands with flour to help prevent sticking, and gently pull the sides of the dough toward the bottom, rotating the dough, until you get a roundish shape with a smooth surface. It should only take you about a minute or less to do this. The dough won’t be entirely in the bottom, where it may look bunched up, but don’t worry about it.


Put it on a cutting board that’s been dusted with cornmeal to prevent sticking, and let it rest for at least 40 minutes. No need to cover it. If the dough has been refrigerated, it helps to let it rest a little more, until it’s no longer chilled.


Twenty minutes before you are ready to bake, put a cast iron skillet (or a pizza stone) in the middle rack of your oven, and put a broiler pan (I used a cookie sheet) in the bottom rack. Preheat your oven to 450 degrees. Dust some flour on the top of your loaf, and slash the top, about 1/4-inch deep.

After twenty minutes of preheating, it’s time to bake. (You can put the bread in after 20 minutes, even if your oven hasn’t reached 450 degrees yet.) Slide the loaf onto the baking stone, and then quickly pour 1 cup of hot tap water into the broiler pan. Then quickly shut the oven door to keep the steam inside.

Bake for 30 to 40 minutes, until you get a nice brown crust. Remove and let cool completely, if you can wait that long.

Friday, January 29, 2010

Blueberry Muffins, plain and simple.

[26/365] snow day muffins

Apparently the snowpocalypse is upon us. My area is under a severe snow warning or something of the sort. What do I do in such situations? Bake muffins, of course. These won't be winning any beauty contests, but they sure are tasty.

Blueberry Muffins

Adapted from All Recipes
Makes exactly 12 regular size muffins
  • 1 1/2 cups all-purpose flour
  • 3/4 cup white sugar
  • 1/2 teaspoon salt
  • 2 teaspoons baking powder
  • 1/3 cup vegetable oil
  • 1 egg
  • 1/3 cup milk
  • 1 cup fresh blueberries
  • 1/2 cup brown sugar
  • 1/3 cup all-purpose flour
  • 1/4 cup butter, cubed
  • 1 1/2 teaspoons ground cinnamon
  1. Preheat oven to 400 degrees F (200 degrees C). Grease muffin cups or line with muffin liners.
  2. Combine 1 1/2 cups flour, 3/4 cup sugar, salt and baking powder. Place vegetable oil into a 1 cup measuring cup; add the egg and enough milk to fill the cup. Mix this with flour mixture. Fold in blueberries. Fill muffin cups right to the top, and sprinkle with crumb topping mixture.
  3. To Make Crumb Topping: Mix together 1/2 cup brown sugar, 1/3 cup flour, 1/4 cup butter, and 1 1/2 teaspoons cinnamon. Mix with fork, and sprinkle over muffins before baking.
  4. Bake for 15 to 20 minutes in the preheated oven, or until done.

Wednesday, January 27, 2010

Black Bean Brownies

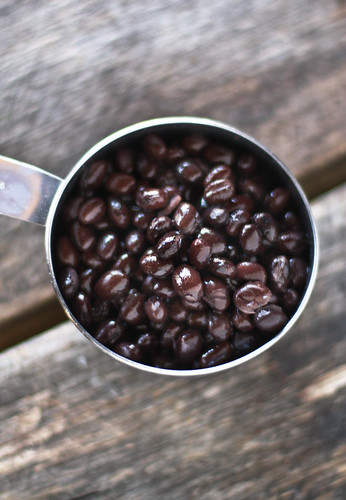
black beans

Black Bean Brownies. Black Bean Brownies?!

When I first stumbled upon this recipe, I was a little bit repulsed. It seemed sort of gross, beans as the main ingredient in brownies? I kept coming back to it though, and the idea grew on me.

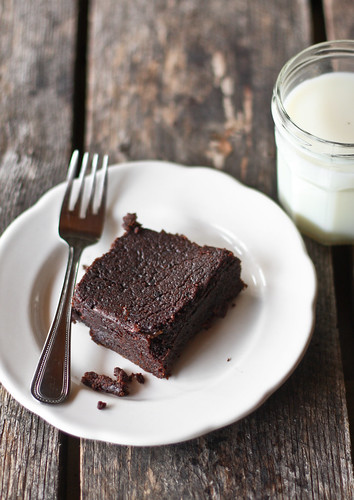
It doesn’t make any sense, but these are good. Not the best brownie ever, by any means, but good. I’m not even sure if brownie is the right word for these, black bean fudge might be better. There’s a lot going on - the coffee flavor, the agave nectar, and of course the beans and the chocolate. Somehow it all works together.

I made mine in an 8x8 baking pan instead of a jelly roll pan, and I have to say that I think they would have been better thinner. Mine were super gooey - a little too gooey. The ones on the outer edge were much better than those in the center, because they were firmer. Also, I found the coffee flavor a little over powering, I’d definitely cut it down, probably half it, if I made these again.

Will I make them again? Probably not, but it’s an interesting option if you're gluten intolerant or diabetic.

black bean brownie

Black Bean Brownie Recipe
From 101 cookbooks

4 ounces unsweetened chocolate
1 cup unsalted butter
2 cups soft-cooked black beans, drained well ( canned is fine)
1 cup walnuts, chopped
1 tablespoon vanilla extract
¼ cup (granulated) natural coffee substitute (or instant coffee, for gluten-sensitive)
¼ teaspoon sea salt
4 large eggs
1½ cups light agave nectar

Preheat the oven to 325°F. Line an 11- by 18-inch (rimmed) baking pan (or jellyroll pan) with parchment paper and lightly oil with canola oil spray.

Melt the chocolate and butter in a glass bowl in the microwave for 1 1/2 to 2 minutes on high. Stir with a spoon to melt the chocolate completely. Place the beans, 1/2 cup of the walnuts, the vanilla extract, and a couple of spoonfuls of the melted chocolate mixture into the bowl of a food processor. Blend about 2 minutes, or until smooth. The batter should be thick and the beans smooth. Set aside.

In a large bowl, mix together the remaining 1/2 cup walnuts, remaining melted chocolate mixture, coffee substitute, and salt. Mix well and set aside.

In a separate bowl, with an electric mixer beat the eggs until light and creamy, about 1 minute. Add the agave nectar and beat well. Set aside.

Add the bean/chocolate mixture to the coffee/chocolate mixture. Stir until blended well.

Add the egg mixture, reserving about 1/2 cup. Mix well. Pour the batter into the prepared pan. Using an electric mixer, beat the remaining 1/2 cup egg mixture until light and fluffy. Drizzle over the brownie batter. Use a wooden toothpick to pull the egg mixture through the batter, creating a marbled effect. Bake for 30 to 40 minutes, until the brownies are set. Let cool in the pan completely before cutting into squares. (They will be soft until refrigerated.)


Just a quick note: I realized today I've been having a lot of real emails go into my spam folder instead of my inbox. If you've seen me an email in the past and I haven't responded, that's why! I'm so sorry, feel free to send it again. :)

Thursday, January 21, 2010

Citrus Tart

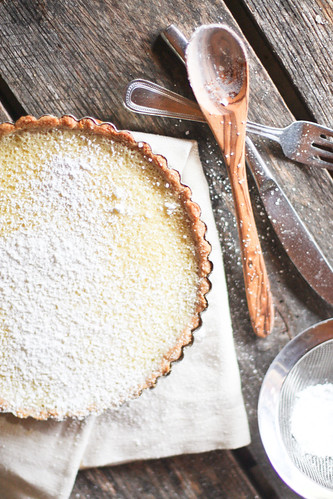
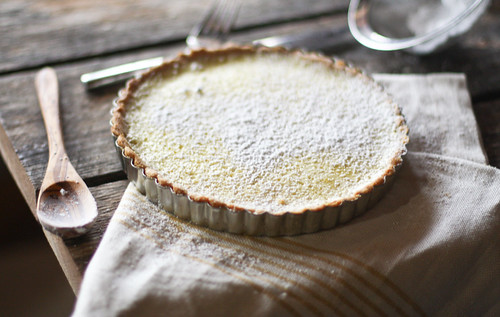
citrus tart

It’s dark, rainy, and gloomy here today. I used to swear up and down that I preferred rain to sunshine. I have no idea why - maybe it was true then, but it’s definitely not true now. I like a good rainstorm, especially in the summer, when they are quick and full of thunder, but in the winter when they last all day, make it so dark outside it seems like evening all day long, I don’t care for it at all. I crave sunshine and the warmth it brings along with it.

IMG_4764

IMG_4725

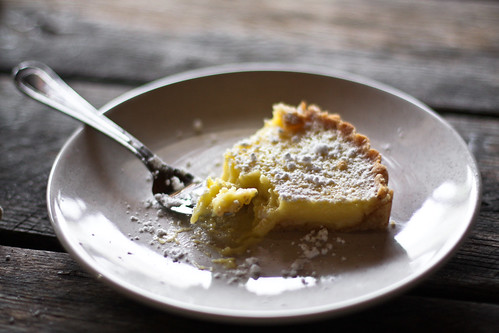
Since there’s no chance of that today, I decided to create some sunshine of my own, in the form of this yummy citrus tart. It has a delicious buttery shortbread crust and a tart but sweet lemon & lime curd-like filling. It’s brightened up my day, for sure.

citrus tart

citrus tart

Citrus Tart
from Martha Stewart

Ingredients
Serves 12 to 14

FOR THE CRUST
1 1/2 sticks unsalted butter, room temperature, plus more for pan
1 1/4 cups all-purpose flour
1 teaspoon coarse salt
1/2 cup whole blanched almonds
3/4 cup confectioners' sugar
1 large egg yolk

FOR THE FILLING
5 large eggs
1 1/4 cups granulated sugar
1/2 teaspoon coarse salt
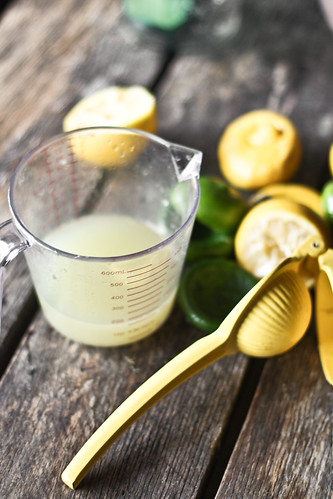
1/2 cup fresh lemon juice (from 6 lemons), plus 2 teaspoons finely grated lemon zest
1/4 cup fresh lime juice (from 4 limes)
2 tablespoons heavy cream (optional)
Garnish: red currants or raspberries and confectioners' sugar

Directions
1. Preheat oven to 350 degrees. Make the crust: Butter an 11-inch fluted tart or quiche pan with a removable bottom (or use a pie plate). Whisk together flour and salt. Pulse almonds with confectioners' sugar in a food processor until finely ground.

2. Beat butter with a mixer on medium speed until pale and fluffy. Beat in almond-sugar mixture. Add yolk and flour mixture, and beat until combined.

3. Press dough evenly into bottom and up sides of prepared pan. Prick dough all over with a fork. Freeze for 20 minutes.

4. Bake crust for 10 minutes. Remove from oven. Press down bottom and up sides if needed. Bake until golden brown, about 13 minutes more (I pressed down the bottom and sides again). Transfer pan to a baking sheet, and let cool for 15 minutes. Reduce oven temperature to 300 degrees.

5. Make the filling: Beat eggs, granulated sugar, and salt with a mixer on medium-high speed until pale and fluffy. Add juices, zest, and cream, and beat until incorporated. Tap bowl on counter to release air bubbles. Pour into prepared crust. Bake until set, about 25 minutes. Let cool completely. Garnish with currants or raspberries and a dusting of confectioners' sugar.
6. Garnish just before serving.